
Deploy A Node.js API to you VPS (Linode)
Intro
Node.js is a cross-platform, open-source (meaning free 🆓) server environment. It can run on Windows, Linux, Unix and MacOS, plus others. It is a backend Javascript technology. Node.js uses asynchronous programming meaning it does not need to wait and simply executes the next relevant request. Node.js runs single-threaded, non-blocking, asynchronous programming, which is very memory efficient.
Building Basic Express API
We can create an express + node.js application in a couple of ways:
Creating the files by hand.
Using the command "
npm init" to initialize the package.json file. This will guide you via prompts to create the package.json file.The third is the fastest, as it creates the necessary files for you. The command used in this instance is "
npm install -g express-generator" which installs the express-generator globally so you can use it anywhere on your local machine. You then need to create a directory and once inside the directory run "express my-app", replace my-app with the name of your application. This creates a new directory (my-app), go inside the folder and install the dependencies by using"npm install". This will install the packages contained within the package.json file. Once completed, run "npm start" to start the server.
In this instance, we shall use the second option. We shall create a folder:
mkdir my-app
We shall then go inside the newly created folder using:
cd my-app
Once inside we run the command:
npm init
This will bring up some prompts from the terminal which you can (at most times) leave blank. Once it is done, it will create the package.json file. You will then need to install the express package via:
npm install express dotenv --save
The dotenv package is for creating environment variables that can hold API keys and passwords. Very handy when you do not want to hard code or expose such in your code.
*NB - it is important at this point to note the files created. One is the package-lock.json file, another is a folder called node_modules. This folder holds the express packages and their dependencies. It is a large file at times, going over 200MBs (looking at you there Angular), so it is important to make sure that the folder and certain files e.g. environment files are not catalogued when we do versioning and pushing our code to our repo. Therefore we use git to exclude the files. If you have not installed it you really should, it is a powerful tool in a dev's toolkit.
To initiate, we run:
git init
We then create the .gitignore file. We edit the file and add node_modules/ and .env to ignore.
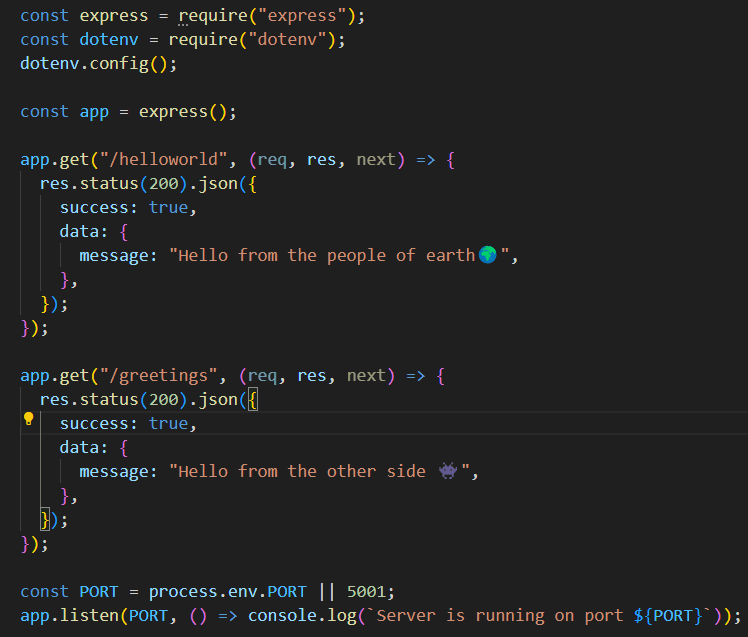
Create a new file and call it index.js - this is the entry point file, it will depend on what you entered when initiating npm earlier. At this point, we can also create our .env file to hold our variables.
index.js
.env
NODE_ENV=production
PORT=5000
Once that is done you may run:
node index.js
You should see a message on the terminal saying "Server is running on port 5000". It is also important to add and commit your files by using "git add ." and "git commit -m "inital commit" " Then once you have created a repo on GitHub, you may push using "git push"
The full repo can be found here: repo
Linode Setup
The setting up of a Linode server can be found here: Setting up a Linode server
After the setting up, you then have to log in to your server and install node and npm. Remember you will be in a terminal environment so it is good to know some basic Linux terminal commands. To install node, you type:
apt-get install npm
You will be prompted if you want to continue, accept and after some time node and npm will be installed. Most times the node version installed is not the latest, therefore you will want to install node version manager, which allows you to choose the various versions of node with ease. We instal NVM via this command:
npm i -g n
After the installation, we can then run the command "n install lts" this installs the latest stable version of node. However even after you install the latest version, the old one still shows when you run "node -v". You need to then log out of your instance and log back in again. Running the command again the new version will show.
Copying the project into the server
The quickest and least painful way to move your project from your local to your Linode is via GitHub. You will have to git clone your repo from GitHub. There are two ways, via HTTPS or SSH. If you want to clone via SSH, you need to add your Linode SSH key to your GitHub profile. You first need to generate the key via:
ssh-keygen -t ed25519 -C "your_email@example.com"
You need to get the public key, denoted by the .pub file. This is usually located in the following path ~/.ssh/id_ed25519.pub From here you can run the following: cat id_ed25519.pub this will print out the key. Copy that and go to your GitHub account settings. In the left sidebar, click on "SSH and GPG keys." Click the "New SSH Key" button. In the "Title" field, give your SSH key a recognizable name, like "My Laptop." In the "Key" field, paste the public key you copied. Click the "Add SSH Key" button. You may be prompted to enter your GitHub password to confirm the addition of the SSH key.
From there you can paste the following on your terminal to clone your project via SSH (I am using my repo in this example):
git clone git@github.com:sMiter911/simple-node-api.git
This will then pull your repo to your server. If you type in the command "ls" in your current directory, you will see the newly created folder called simple-node-api which contains your project. Go into the folder using the command "cd simple-node-api". Inside your folder you will have to install the packages in the package.json file, run "npm install".
That is good and well but remember, we do not have our environment file hence there may be an issue we need to access our API or password variables. You can use WinSCP to copy and paste from your local machine to the host machine, the .env file. Another option is to use the scp command:
scp ~/Desktop/simple-node-api/.env root@<your-linode-ip-address>:~/simple-node-api
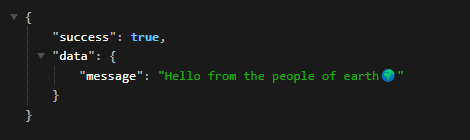
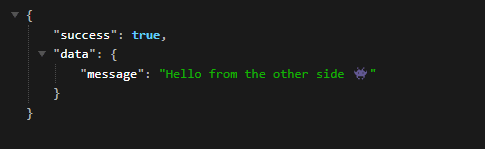
This will copy the file into your project. You can then run the command "node index.js" to check if your project runs well. You should be able to see the endpoints if you go to your browser and enter the following:
<your-linode-ip-address:5000/helloworld>
<your-linode-ip-address:5000/greetings>
Setup PM2
The issue with this approach is the server does not run perpetually. You always need to start the server. So if your Linode crashes and reboots, you will have to manually go and restart it. There is another option, PM2 (Process Manager 2). You can first install PM2 by running: "npm install -g pm2
", once installed all you have to do is then run "pm2 start index.js -n api".
The -n flag is the name of the process being run so that it is easier to recognize it or when you want to stop the process using "pm2 stop api". The last command to run is "pm2 startup ubuntu". This basically creates a script that will allow PM2 to automatically start the process if there ever is a server crash or a reboot.
Setup a reverse proxy with NGINX
A reverse proxy is a server that sits between client devices and a web server, forwarding client requests to the web server and returning the server's responses to the clients. It is commonly used for load balancing, security, and serving multiple web applications through a single point of access. To start off you need to install nginx via: "apt-get install nginx".
Go into the folder ~/etc/nginx/sites-available and look for a file called default, if you want to only run one API, WordPress, or static site with one domain attached, then you can keep the file and edit it. However, it is common practice to either delete and create .conf files or just keep the default file as a reference and create new ones.
To edit the file or create a new one, we use the command: "nano site1". This opens up a text editor. Change the server_name domain(s) to your own and also the localhost port.
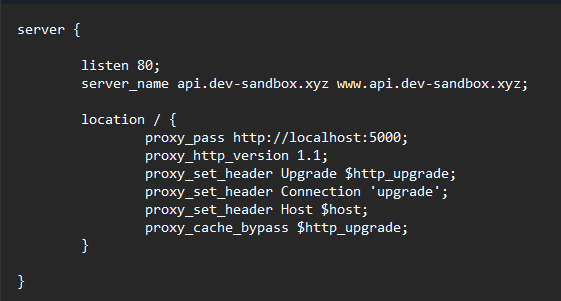
That is the basic .conf file and for the most part that is what is required. If you have created a new file, you need to symlink from your sites-available/site1.conf file to the sites-enabled directory. You do this via the command:
ln -s /etc/nginx/sites-available/site1.conf /etc/nginx/sites-enabled/
Finally, test your Nginx configuration changes:
nginx -t
Restart the web server:
systemctl restart nginx
Setting up Firewalls
We now need to create rules that will only allow certain traffic into our server. This adds an extra layer of security to not only our server but to our applications. We do this by entering the following: "ufw enable" it will ask if we want to proceed. We enter yes.
Now want to enable SSH, HTTP, and HTTPS.
SSH:
ufw allow sshHTTP:
ufw allow httpHTTPS:
ufw allow https
We now won't be able to run via port 5000 anymore so we have to remove it from our URL.
Setting up a domain name and SSL
Now we may be able to go to our API via HTTP, however, when we try to go in via HTTPS it bombs out. Why? Well, we do not have an SSL certificate yet and in order to get one we first need to set up a domain name. We can then get our certificate via certbot.
First install certbot via: "snap install --classic certbot". Snap is also a package manager for Linux like apt-get. We then need to run the following so that the certbot command can be run anywhere: "ln -s /snap/bin/certbot /usr/bin/cert".
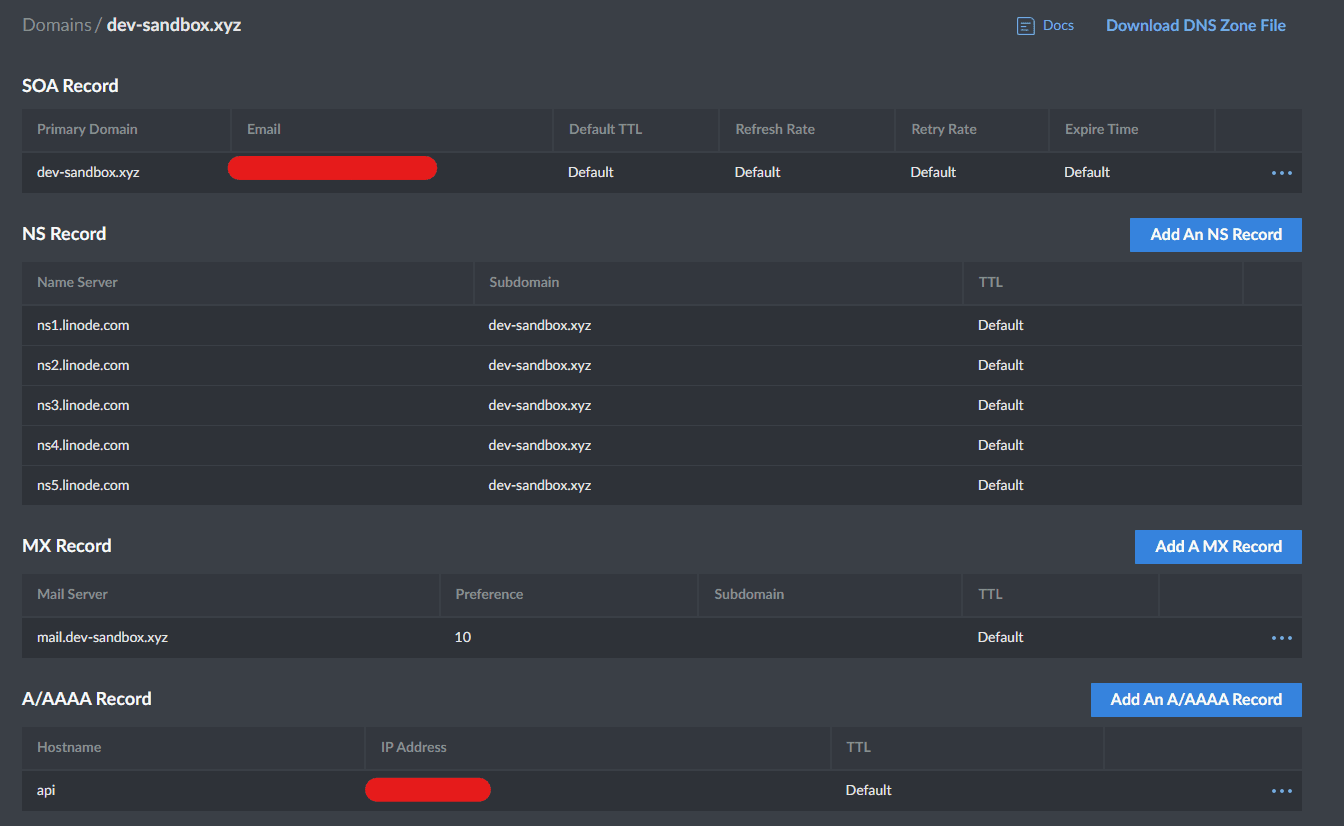
Before going any further we have to get a domain name first from a provider e.g. Namecheap, GoDaddy, etc. You will then need to create a set of custom DNS records on the DNS settings. These need to point to the Linode NS records as follows:
ns1.linode.com
ns2.linode.com
ns3.linode.com
ns4.linode.com
ns5.linode.com
From there, we go to our Linode dashboard and select the Domains option. We create a domain there as well with the same domain you used by your provider. After entering the details and attaching the domain to the relevant Linode we are ready to go with the next step. Below is an example of my setup:
Once the domain name has propagated (can last up to 48 hours), you will be able to use your domain name instead of the IP address to access the application. However, there is still the issue of HTTPS.
We get this by running the following command if you are still connected to your Linode via the terminal: "certbot --nginx". It will ask you which domain names to activate HTTPS for. Leave the input blank to select all options, this would be for site1.xyz and also www.site1.xyz for example.
If the propagation was successful the certificate generation should have gone on without a hitch. Check on your browser and there should be a lock next to your address. One last command to run is: "certbot renew --dryrun". This will simulate certbot's renewal of a certificate (valid for 90 days), which it does automatically for you.